
By John Gruber
WorkOS Pipes: More context makes for smarter products.
Tiger Details
24 February 2026
Notes, comments, and observations regarding Mac OS X 10.4.
Tip: RSS feed to track updates to this page.
Press-and-Hold for Dashboard and Exposé Keyboard Shortcuts ★
The usual, or at least obvious, way to use the keyboard shortcuts for semi-modal features like Exposé and Dashboard is:
- Hit the key. (E.g. F12 for Dashboard.)
- Use the mode.
- Hit the key again when you’re done.
It ends up there’s a second way to use these shortcuts: press-and-hold:
- Press and hold the key down.
- Use the mode.
- Release the key when you’re done.
I’m not going to argue that this saves any time or effort, but ever since I learned this trick, I’ve been using it whenever I invoke Dashboard and the application windows mode of Exposé. I mean, if you’re going to be using some Dashboard widget for a while, sure, you’ll want to use the regular “tap the key” mechanism — but if you just want to glance at one or more status-displaying widgets (e.g. Weather), the press-and-hold mechanism feels just right. It’s also worth noting that the Exposé shortcuts work like this in Mac OS X 10.3, too.
(Thanks to Dave Giunta for the tip.)
Pass Command-Line Arguments to AppleScript Scripts ★
The command-line osascript tool allows you to execute AppleScript scripts from the command-line. In Mac OS X 10.0 through 10.3, the only argument you could pass to osascript was the script to execute. In Tiger, you can now pass along arguments to pass to the script itself.
From the osascript man page:
Any arguments following the script will be passed as a list of strings to
the direct parameter of the ``run'' handler.  For example:

      a.scpt:
      on run argv
          return "hello, " & item 1 of argv & "."
      end run

      % osascript a.scpt world
      hello, world.
(Thanks to MacOSXHints.com.)
Built-In Support for Advanced OpenType Features ★
Mac OS X has long supported built-in support for advanced typographic features — e.g. genuine small caps, automatic ligatures, old-style figures, etc. — in AAT fonts. AAT stands for Apple Advanced Typography, and several of these fonts ship with Mac OS X, including Hoefler Text, Didot, and Zapfino.
Apps that use ATSUI (Apple Type Services for Unicode Imaging) for text rendering get support for these advanced typographic features, including Pages, Keynote, and just about any app that uses the standard Cocoa text editing field.
This was all well and good, but wasn’t of much use to serious type users because AAT fonts are not widely produced by companies other than Apple. The de facto standard format for fonts with built-in advanced typographic features is OpenType.
The good news is that starting with Tiger, Mac OS X now automatically maps OpenType features to AAT features. This means if you have OpenType fonts installed, they now “just work” in apps that previously provided advanced typographic features only with AAT fonts. If you have any OpenType fonts installed (several excellent OpenType fonts are included with the Adobe Creative Suite, for example), you can try these features out in TextEdit. Open the Fonts panel, then open the Typography palette from the Font panel’s gear menu.
The Typography palette is contextually smart, only showing the features available for the current font. Apple doesn’t support as many OpenType features as Adobe’s own applications (which render text using their own cross-platform code), but it’s a terrific start.
(Thanks to Mark Simonson, Eric Allison, and Andreas Bachofen for the tip.)
WaitingForLoginWindow ★
Recall from an earlier entry in this list that during the boot process, Mac OS X no longer displays status messages telling you which processes are starting when. It ends up that in Tiger, the progress bar you see while booting is a complete sham — it’s just something to look at while you’re waiting for the loginwindow process to start. (Cf. Charles Miller’s “The Placebo Mini-Pattern” if you’re curious why Apple would bother with this sham progress bar.) The progress window is displayed by the aptly-named WaitingForLoginWindow process.
(It’s even documented by a man page: type man WaitingForLoginWindow at a command-line prompt.)
The pace of the progress bar isn’t measuring anything — it’s just a guess as to how long it will take until loginwindow is ready. When loginwindow appears, it kills the WaitingForLoginWindow process. When it exits, WaitingForLoginWindow stores the number of seconds it ran in a text file here:
/var/db/loginwindow.boottime
The next time it runs, WaitingForLoginWindow uses the number of seconds stored in this file to set the duration and pace of its progress bar animation. Examine the contents of this file to see how long WaitingForLoginWindow ran the last time you booted. (On my iBook it was “20.711155”, but the next time I rebooted, it dropped to “4.642473”; on PowerMac G5s, it’s generally 1-3 seconds.)
The fun part is that you can launch WaitingForLoginWindow at any time. Using Terminal, execute:
/usr/libexec/WaitingForLoginWindow
Up pops the “Starting Mac OS X...” progress window. It’s harmless, pointless, but kind of fun. To quit it, you can type killall WaitingForLoginWindow at the command line.
When you’re playing around with it from the Terminal like this, WaitingForLoginWindow doesn’t write to the loginwindow.boottime file because it needs administrator privileges to do so. (If you launch it with sudo /var/db/loginwindow.boottime, however, it will write its run time duration to this file.) If you change the number of seconds in the /var/db/loginwindow.boottime file, you can change how fast the progress bar moves the next time you boot. This has no effect on how long it actually takes to boot — it just alters the pace of the progress bar.
(Thanks to Matt Deatherage and the 22 May 2005 issue of MDJ.)
Cosmetic Improvements to AppleScript Dialog Boxes ★
The various dialog boxes provided by the User Interaction suite defined in the Standard Additions OSAX have all received cosmetic, and in some cases functional, improvements.
For example, consider the display dialog command. Here’s a short example that simulates the error dialog from my PHP Syntax Checking script for BBEdit:
tell application "BBEdit"
  set msg to "Parse error: parse error in df_banner.inc on line 6"
  display dialog "PHP " & msg with icon caution ¬
      buttons {"OK"} default button 1
end tell
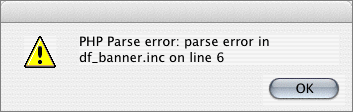
On Mac OS X 10.3, the resulting dialog box looked like this:
On Mac OS X 10.4, the resulting dialog box looks like this:
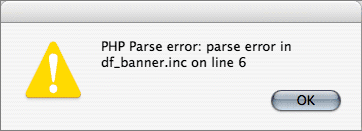
The biggest difference is that the icon is bigger and looks better, but you can also see Aqua’s stripes continue to fade away with each major release.
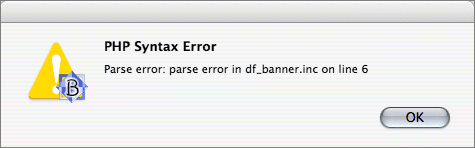
AppleScript 1.10 also introduces a new display alert command, which is similar to the display dialog command, but uses slightly different syntax, and provides a few additional options. The main difference is that it allows for both a bold-face title string, and a separate explanatory message.
tell application "BBEdit"
  set msg to "Parse error: parse error in df_banner.inc on line 6"
  display alert "PHP Syntax Error" message msg as warning
end tell
Its output looks much more like a standard Mac OS X dialog:
(The display alert command isn’t actually new; it has been a part of AppleScript-Studio since its inception. What’s new is that you can now use display alert in any script, not just in Studio apps.)
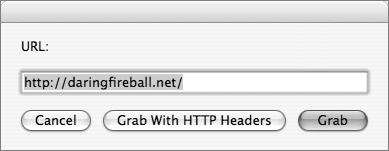
The text-editing field used by the display dialog command now uses the modern Mac OS X text rendering engine instead of the deprecated QuickDraw routines. Considering the following script:
display dialog "URL:" default answer "http://daringfireball.net/" ¬
    buttons {"Cancel", "Grab With HTTP Headers", "Grab"} ¬
    default button "Grab"
On 10.3, this produces:
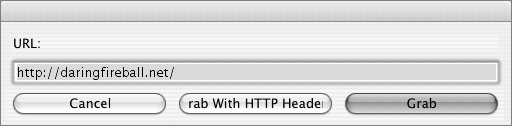
On 10.4, it looks like this:
Note also that previously, when you specified three buttons in a call
to display dialog, all three buttons would be the same width,
determined by the length of the longest of the three labels. This
produced unsightly results whenever the button labels were of varying
lengths, and in some cases, as shown above, it resulted in the longest
label being truncated.
A nice functional improvement in AppleScript 1.10 is that when using
the listbox provided by the choose from list command, you can now
use type-ahead to select an item in the list.
For more details on what’s new in AppleScript on Tiger, see the AppleScript 1.10 Release Notes.
Extraneous Returns Stripped From Text Pasted Into Single-Line Fields ★
As noted by Pierre Igot on his weblog:
For a long time, when I was filling out Web forms in Safari, I had to deal with the fact that, when I had copied text from another application and tried to paste it into a single-line text entry field in the Web form, if I had accidentally included the return character at the end of the line of text in the selection before I had copied it to the Clipboard, then when I pasted the contents of the Clipboard into the single-line text entry field, Safari would also insert the return character at the end of the line of text and make the single-line text field “scroll” down (even though it doesn’t have a vertical scroll bar, since it’s a single-line text entry field).
The end effect would be that, after pasting the contents of the Clipboard into the field, the field would look like it was still empty, because Safari would actually be showing the second line of text after the carriage return, which indeed would be empty. It was weird. You could still fix the problem by simply pressing the Delete key once after pasting the text, which would delete the return character and put the focus back on the first — and only — line of text in the field. But it was weird nonetheless.
Starting with Safari 2.0 (and 1.3 for Mac OS X 10.3.9), this is fixed. Any trailing returns are now automatically stripped when pasting text into single-line text fields in web pages. (Safari has always done this when pasting into the Location field in the Address Bar.)
Pierre also points out that it’s not just trailing returns that get stripped — if you paste multiple non-empty lines into a single-line text field, only the first line is actually pasted.
Widgets Only Use Standard Font Smoothing ★
No matter which style of font smoothing you’ve chosen in the Appearance panel of System Preferences, Dashboard Widgets always render text using “Standard” font smoothing. This means if you’ve chosen Light, Medium, or Strong font smoothing (or if you’ve chosen Automatic and are using a flat panel display, in which case the system uses Medium), text looks different in Widgets than it does elsewhere.
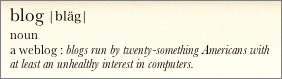
This is especially noticeable in the Dictionary widget, where the Baskerville typeface looks weak and wispy, and the italics are barely legible. Whereas in the Dictionary application, Baskerville looks great.
Compare the following screenshots, snapped with my font smoothing preference set to Medium. (If you’re using a CRT display to view these screenshots, the text in the Dictionary application might look like it has colored fringes; that’s because the Light / Medium / Strong smoothing options are intended for use on flat-panel LCD displays.)
The Dictionary widget:
The Dictionary application (with the font size decreased by one click, so as to match the size used by the widget):
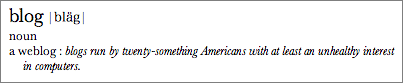
(Brief interpolation on the above-pictured definition of “blog”: The italicized portion is not part of the definition itself; it’s example usage.)
One explanation for this might be that it’s because each widget process is a child process of the Dock, and the Dock does the same thing with the white-text-with-drop-shadow text it displays when you hover the mouse over an icon: it’s always rendered with Standard font smoothing. But even so, this raises the question as to why the Dock ignores this preference.
And, strangely, the “More Widgets...” button above the Widget Bar is rendered using Light / Medium / Strong font smoothing, but the widget names at the bottom of the Widget Bar are not.
Regardless of the explanation, the end result is that widgets do not look as nice as they could on flat-panel displays, which is really odd considering that “looking cool” is at least half the appeal of Dashboard.
(Thanks to Jussi Hagman).
GIF Creation ★
Now that Unisys’s patent on the LZW compression algorithm has expired, software can now create GIF image files without paying Unisys a licensing fee. QuickTime-based apps like Preview now allow you to save GIFs. (You could always view GIF files in QuickTime-based apps, but you couldn’t generate them.)
Safari Now Supports Proper Text-Editing Shortcuts ★
When you’re editing text in a browser window, Safari now supports most of the standard Mac text editing shortcuts. E.g. Command-Shift-← / Command-Shift-→ for selecting text from the insertion point to the beginning / end of line.
In previous versions of Safari, however, those two shortcuts were used for switching between tabs (the Select Next Tab and Select Previous Tab menu items). Starting in Safari 2.0 (and also in Safari 1.3 for Mac OS X 10.3.9), the shortcuts for switching between tabs was changed to Command-{ and Command-}, which on a U.S. keyboard means typing Command-Shift-[ and Command-Shift-].
When the input focus is not on a text field, however, Safari still supports the old shortcuts for switching tabs.
Many people seem annoyed by this change, but it was the right thing for Apple to do. Or, perhaps better said: it was wrong for Safari ever to have used standard text-editing shortcuts for menu key shortcuts. And if you really can’t get used to the change, you can edit the menu key shortcuts in the Keyboard & Mouse panel in System Preferences.
‘Automatic’ Font-Smoothing Style ★
Mac OS X has offered two main algorithms for on-screen font smoothing (a.k.a. anti-aliasing) since 10.2. The “Standard” algorithm does exactly what you think of when you think of anti-aliasing — when rendering black text on a white background, it uses shades of gray to smooth the curves and lines of the letter forms. The second algorithm, sub-pixel rendering, is based on the idea that each pixel on an LCD display is comprised of three sub-pixels: red, green, and blue. The trick with sub-pixel rendering is that instead of using shades of gray pixels to smooth black text on a white background, it instead uses shades of red, green, and blue.
Mac OS X offers three versions of sub-pixel rendering: Light, Medium, and Strong. Medium is described as “best for Flat Panel”, but in fact all three are only intended for flat panel displays — the sub-pixel rendering trick only works on LCDs.
(For more — much more — on the differences between these algorithms, see my article “Panther Text Rendering” from November 2003, shortly after Mac OS X 10.3 shipped.)
I’m inundated with email from readers who believe that with Tiger, Apple has significantly changed the way text is anti-aliased on-screen. This isn’t true. What has changed is that Apple has added a new option to the font-smoothing pop-up menu in the Appearance panel of System Preferences: “Automatic - best for main display”, and which is now the default setting for this preference. On CRTs, Automatic uses the Standard algorithm; on LCDs, it uses Medium.
Those who are noticing a profound difference in the way text is rendered on-screen are using flat-panel displays and have this preference set to “Automatic”. Previously, the default font-smoothing preference was “Standard”, even if you were using a flat-panel display.
I happen to think this change is a good one, producing better-looking on-screen text for flat-panel users. It’s obviously quite subjective, however, which is why Apple offers several options for this preference.
Dock Icons Accept Clippings via Drag and Drop ★
You can finally drag and drop clippings to icons on the Dock. (In previous versions of Mac OS X, there was no way to get an app icon in the Dock to accept a drag that contained a clipping.) This includes URL clippings:
- You can drag a URL to Safari and it will open that URL in a new window.
- You can drag the URL for an XML feed to NetNewsWire 2, and it will create a new subscription to that feed.
- You can drag text to Safari, and it will perform a Google query on the text you dragged.
- You can drag any text clipping (regular text, URL, etc.) to BBEdit, and it will open a new document containing that text.
(Thanks to Jesper and Eric Blair.)
Keyboard Shortcuts in Dashboard ★
Hover the mouse cursor over any running widget and hold down the Option key. You can then close that widget immediately, without having to display the Widget Bar. (Thanks to Scot Jandly.)
To toggle the display of the Widget Bar, use Command-= (equal sign). (Thanks to Daniel Bogan.)
[Update: Email from users of non-QWERTY keyboard layouts indicates that the shortcut for displaying the Widget Bar is Command plus the key to the left of Delete. That’s “=” on a U.S. keyboard, but on a French AZERTY layout, it’s the “-” (dash) key. I.e. the shortcut is tied to the key, not the character. (Thanks to David Latapie.)]
To refresh the frontmost widget, use Command-R.
Widget Bar Penalizes Double-Clicking ★
[Update: Apple fixed this in a subsequent 10.4.x update; double-clicking an icon in the Widget Dock now launches a single instance of the widget.]
An awful lot of casual Mac users are more or less hopelessly confused about when they need to double-click something to “open” it. (This applies to Windows users too, for that matter.) What tends to happen is that when they’re learning to use the computer, they’re tripped up by the entire concept of double-clicking — they either don’t click fast enough, or their coordination is poor and they move the mouse too much between the first and second clicks. Eventually they get the hang of it, but they never quite figure out the rules for when they need to double-click versus when a single-click will do, so what they end up doing is double-clicking just about everything.
In general, however, this confusion seldom matters. For example, you only need to single-click links in a web browser, but if you double-click them instead (as my father does), it doesn’t make any difference. Same goes for the Mac OS X Dock; a single-click launches an app, but a double-click does the same thing.
Not so with the Dashboard Widget Bar. Each click on a widget counts. Click once to open an instance of a widget. Click twice and you get two instances. Making matters much worse is that each instance of the widget opens in the exact same position on screen, so the most-recently-launched instance completely obscures the others, which means it looks like you’ve only launched one instance of the widget you double-clicked, even though you launched two.
Only when you move or close this widget will you discover that you’ve had another instance running underneath all along, which for most people will generate some measure of surprise and confusion.
Things Apple should do to fix this:
Double-clicks in the Widget Bar should launch a single instance of a widget. If you really want to launch two instances of a widget, just wait a second or two between clicks, or use drag-and-drop. A double-click on a widget in the Bar almost certainly means “open this once”.
When you open multiple instances of a single widget, each subsequent instance should be positioned on screen with a small diagonal offset from the previous instance so they don’t completely overlap — just like when you open a new document in any normal application.
Kill the Dock to Restart Dashboard ★
Each Dashboard widget runs as a separate process. You can see this in Activity Monitor (or, from the command line, top). There is no master “Dashboard” process; instead, the parent of every widget process is the Dock. The Dock is also responsible for the Widget Bar. So if you want to restart the entire Dashboard environment, just kill the Dock using Activity Monitor (or, from the command line, kill). The Dock will relaunch automatically, along with a fresh instance of the Dashboard environment.
That there is no master “Dashboard” process, and that the Dock is in fact the parent of every running Dashboard widget, helps explain the curious behavior of the Dashboard icon in the Dock. You can drag it off the Dock while it’s “running” and it will poof, even though Dashboard is still available and any running widgets remain running. Drag any other running application out of your Dock, and it springs back in to place as soon as you drop it. That’s because the Dashboard Dock icon is a sham; it’s just a proxy — something you can click on to activate Dashboard mode, and a place to put Dock menu commands related to Dashboard. The Dashboard Dock icon has nothing to do with whether any widgets are currently “running” or not — which makes it completely unlike every other app icon in the Dock.
If you do remove it from your Dock, you can put it back by dragging the “Dashboard.app” application from /Applications/. This creates the illusion that this Dashboard.app somehow “is” the Dashboard widget runtime environment. But it’s not. Remember, running widgets are owned by the Dock, not a separate Dashboard process. In fact, the bundle identifier for Dashboard.app is “com.apple.dashboardlauncher”, which name is quite apt. This is not a regular app that stays running: when you launch it, it switches you to Dashboard mode, and then quits. Again, you can see this with Activity Monitor — and that’s why Dashboard doesn’t appear in the Command-Tab switcher.
If you just want to refresh the contents of the Widget Bar to reflect any changes to your /Library/Widgets/ or ~/Library/Widgets/ folders, you can simply click the left/right buttons in the Widget Bar to page through the list. Doing so seems to pick up new/removed widgets. But this won’t help if you have a wide enough display that all of your installed widgets fit on one screen.
Command-Return Displays Form Results in New Tab ★
In just about any web page form field, you can use Command-Return to have Safari display the results in a new tab. Try it here on Daring Fireball by scrolling to the bottom of this page and using the search form. In previous versions of Safari, you could use Command-Return to open a new tab when using the the location and Google search fields in the address bar, but the ability to use this from web page form fields is new to Safari 2.0 and version 1.3 on Mac OS X 10.3.9. (Thanks to Sage Olson.)
PNG Now Default Format for Screenshots ★
When using the system’s built-in keyboard shortcuts for screen captures (Command-Shift-3 to capture the screen, Command-Shift-4 to capture the selected area), output files are now saved as PNGs. In Mac OS X 10.2 and 10.3, these screenshots were saved as PDFs. PNG is a much better choice. (Of course, if you use Snapz Pro X, as I do, you can choose from PNG, PDF, TIFF, JPEG, PICT, GIF, BMP, and PSD.)
‘dict://’ URL Scheme ★
Tiger’s new Dictionary app registers with Launch Services as the
default handler for the dict:// URL scheme. The idea, I presume, is
that one should be able to construct URLs that direct Dictionary to
look up words. Documentation for this, however, seems non-existent.
There’s no mention of the dict:// URL scheme anywhere in
Dictionary’s help book.
RFC 2229 defines the dictionary server protocol, section 5 of which pertains to “URL Specification”. It starts:
The DICT URL scheme is used to refer to definitions or word lists available using the DICT protocol:
dict://<user>;<auth>@<host>:<port>/d:<word>:<database>:<n>
dict://<user>;<auth>@<host>:<port>/m:<word>:<database>:<strat>:<n>
The “/d” syntax specifies the DEFINE command (section 3.2), whereas the “/m” specifies the MATCH command (section 3.3).
Some or all of “
<user>;<auth>@”, “:<port>”, “<database>”, “<strat>”, and “<n>” may be omitted.
The DICT protocol, which is the main subject of the RFC, is about
querying a dictionary server over the network. That’s not what Apple’s
Dictionary does — the data source for Dictionary is a local database,
not a server on the network. So most of the tokens in the URL scheme
defined by the RFC aren’t applicable: <user>, <auth>, <host>,
<port> aren’t needed.
Dictionary, however, seems to ignore all of them. Even the “/d:” and
“/m:” actions, for “define” and “match”, which according to the RFC
aren’t optional, aren’t supported by Dictionary.
So far as I can tell, the only URL format accepted by Dictionary is in the form:
dict:///<word>
Note that it requires three slashes, not two. For example:
Seems simple enough. But what stinks is that the query must be an exact match. If you misspell the word, the look-up fails silently. The only thing that happens for a failed look-up from a URL is that the Dictionary app activates. For example, this won’t work:
because “insouciant” is misspelled. In the regular Dictionary user interface, if you make a misspelling, it usually susses out what you meant and offers a suggestion. Type “insoucient” in the query field and you’ll be asked: “No entries found. Did you mean?”, with “insouciant” selected. All you need to do is hit Return to see the definition of “insouciant”.
It’d be nice to see a future update to Dictionary offer suggestions for queries that don’t match any entries in the database.
Update: Several readers report that this feature doesn’t seem to
work at all. The problem is that even if you spell the search term
correctly, these dict:// format URLs only work if the Dictionary
app is already running. If it isn’t, opening a dict:// URL will
launch Dictionary, but nothing will get looked up.
Canadian English Keyboard Layout ★
Tiger includes several new keyboard layouts, including one for Canadian English. It seems to be identical to the U.S. keyboard layout, the only difference being that when you turn on the input menu (by way of the Input Menu section of the International panel in System Preferences), you get a Canadian flag icon instead of the U.S. stars and stripes. (Thanks to Andrew Dunning.)
Dashboard Scrollbars Suck ★
All of Apple’s Dashboard widgets that have scrolling content views use a weird moon-man scrollbar, that neither looks nor acts like a normal Aqua scrollbar. You can click and drag the elevator to scroll, but that’s it. There aren’t any up/down buttons, and, more annoyingly, they don’t work with the scrollwheels on third-party mice, and they don’t work with the new two-finger scrolling trackpads on the latest PowerBooks. But hey, they look cool.
Update, 16 May: As of 10.4.1, widget scrollbars now work with mouse scrollwheels and two-finger trackpad scrolling, which means they no longer suck as bad as they used to. But they still don’t work as well as standard Aqua scrollbars. For example, they don’t support jump-to-here scrolling, neither by Option-clicking nor by supporting the setting in the Appearance panel of System Preferences.
iChat Search ★
Chat windows are now searchable in iChat 3.0 — just use the standard Edit -> Find sub-menu, or the standard menu key shortcuts. You need to put the focus on the conversation pane, however; it doesn’t work when the focus is on the text input field. This should have been enabled all along, but it’s better late than never. (Thanks to Matt Pillsbury.)
‘Save Image As…’ Contextual Menu Item ★
Previous versions of Safari had a “Save Image As…” contextual menu item, which allowed you to pick the destination for downloaded images. This command is gone from the default contextual menu in Safari 2.0, but if you hold down the Option key, the “Save Image to ‘Your downloads folder’” command changes to “Save Image As…”.
Safari’s Cookie Sorting ★
Nat Irons observes:
“This pertains to 10.3.9 too, but Safari’s cookie display in 1.3 and 2.0 now intelligently sorts domains by ignoring any leading periods or ‘www’ prefixes, so a ‘www.bestbuy.com’ cookie appears next to a ‘bestbuy.com’ cookie in what usually turns out to be a staggeringly long list. Smoove.”
More on Fitts’s Law and the Edges of the Screen ★
The Fitts’s Law benefits of using the targets of the screen as clickable targets — discussed fully in the entry on the Apple and Spotlight menus — are also taken advantage of by Dashboard. When you’re in Dashboard mode, you open the widget bar by clicking the “+” button in the lower-left corner. In a very nice touch, the clickable target for this button extends all the way to the lower-left corner of the screen. Try it — it’s a cinch to hit by just flinging the pointer to the corner. Clicking at the edges of the screen also works for hitting the left/right buttons that page through the widgets in the bar.
On the other hand, the Dock still does not take advantage of Fitts’s Law for drag-and-drop. When dragging items onto icons in the Dock, you can’t drag to the edge of the screen directly under the icon you’re targeting (or next to the icon, if, like any sensible person, you’ve positioned your Dock on the side of the screen). What’s crazy about this is that the Dock does take Fitts’s Law into account for clicking on icons — you can click under/next to an app’s icon in the Dock to activate it, but you can’t use those same pixels along the edge of the screen for drag-and-drop.
No More Pasting Passwords Into Authentication Dialogs ★
The system’s standard authentication dialog used to allow for pasting in the password field; in Tiger, it doesn’t. I used this for some beta software, where new builds are distributed via downloadable password-protected disk images and the password is sent in an email message. Assuming this change was made for increased security, however, it’s a good idea.
Stale Icons ★
Now, at long last, when files are created, moved, or deleted by another process, the changes are instantly reflected in the Finder. For example, if you delete a file from the command-line, it will instantly disappear from any Finder windows in which it appeared.
However, icon-related changes still don’t take effect immediately. For example, let’s say SubEthaEdit has claimed “.csv” files, but you’d rather have them open in BBEdit by default. Select one such file contained in a folder with several others, do a Get Info on it, change the “Open with” application to BBEdit, then click “Change All” to make BBEdit the default editor for “.csv” files.
The icons for all currently visible “.csv” files should update to reflect the change, but they don’t. The only icon the Finder updates is the one for the file you selected to Get Info on. But if you double-click one of the “.csv” files with a stale SubEthaEdit icon, it will in fact open in BBEdit. This bug has been around for the entire life of Mac OS X.
Microsoft Fonts Still Included ★
Microsoft’s cross-platform fonts are still installed with Tiger. This includes the stellar Verdana and Georgia (which are both highly optimized for on-screen display), as well as lesser fonts such as Times New Roman (not to be confused with Times, which comes from Apple), Courier New (which I’ve always felt would be more aptly named “Courier Anemic”), Trebuchet, Webdings, Arial, and everyone’s favorite: Comic Sans MS.
This was a major concern for web designers once word spread that Internet Explorer was no longer included; in previous versions of the OS, these Microsoft fonts were officially considered components of the IE installation. Verdana and Georgia are especially important — they’re the only high-quality screen fonts web designers can really count on for all Mac and Windows users.
Modify the Modifier Keys ★
In the Keyboard section of the Keyboard & Mouse panel in System Preferences, there’s a new “Modifier Keys” button. Click it and you get a dialog box where you can change the meaning of any of the modifier keys, including the Caps Lock key:
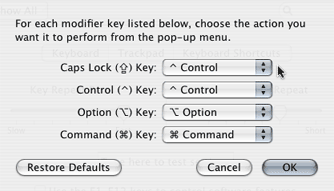
My only gripe is that it doesn’t include the Enter key on iBook and PowerBook keyboards.
‘Welcome to Macintosh’ ★
While booting, Tiger no longer displays a series of vaguely-informative status messages describing which subsystems are launching. All you see during the Tiger boot sequence: the gray Apple logo screen, then the spinner under the Apple logo, then a progress bar with the text, “Starting Mac OS X”. Next up is the Login panel.
Gone, therefore, is the phrase “Welcome to Macintosh”, which I believe (as does Nat Irons, who submitted this observation) was the last remaining high-profile usage of “Macintosh” by Apple. “Mac” is used all over the place — PowerMac, iMac, eMac, Mac OS X, .Mac — but the full “Macintosh” has apparently been placed on the same shelf as the six-color Apple logo.
Update: There are at least two remaining instances of “Macintosh”:
- The Finder’s about box still contains the slogan, “The Macintosh Desktop Experience”. (Thanks to Scott Lewis and Peter Orosz.)
- The default name for the startup disk on a new Mac is still “Macintosh HD”. (Thanks to Michael Croft.)
Multiple Get Info Windows ★
In the beginning — meaning in the classic Mac OS — there was the Get Info command. Select a bunch of files, choose File -> Get Info (or use the Command-I menu key shortcut), and the Finder would open a separate Info window for each selected item. For a small number of files, the Finder would intelligently tile the windows on screen such that they could be compared side-by-side.
Mac OS X 10.0 replaced the Finder’s each-item-gets-its-own-info-window concept with the Info Inspector, a single window that applied to whatever was selected in the Finder. Rather than showing multiple items’ info side-by-side, it displayed a single list of shared attributes for multiple items. This change was despised by just about everyone who didn’t previously work for NeXT.
Classic-style Get Info windows returned to the Finder in 10.2, but, frustratingly, only if you invoked the Get Info command one item at a time. With multiple items selected, you still got a single “Multiple Item Info” window.
The Tiger Finder has finally gone back to the classic style: select multiple items, invoke Get Info, and you get a separate Get Info window for each item.
If you really want the single-window Info Inspector, it’s still available via Command-Option-I. Or, with Command-Control-I, you can get a version of the single-window summary info in a regular window (as opposed to the floating palette used by the Command-Option-I inspector).
Update: If you’ve got more than 10 items selected and do a Command-I, the Finder reverts to the old-style single info window. This is a nice touch — if you have that many items selected, it’s likely what you wanted. This is especially true if you’re accustomed to the previous behavior and are in the habit of selected a large group of files and using Get Info to see how large the entire group is.
(Thanks to Nick Matsakis for the original tip, and to Ken Sjoquist for noting the difference with more than 10 items selected.)
Internet Explorer No Longer Included ★
If you install Tiger as an upgrade, you won’t notice, but fresh installations of Mac OS X no longer include Internet Explorer. (This also means brand-new Macs ship from the factory without IE.) Upgraders won’t notice because existing copies of IE are left intact.
It was inevitable that this was going to happen eventually, and now seems like a good time. It’s well-nigh time for the world to acknowledge that Mac IE is dead.
(Thanks to James Duncan Davidson.)
Spotlight Menu Keyboard Shortcuts ★
Go to the Spotlight menu and enter a query. As the results start filling in, hold down the Command key. The default option in the results list will change from the Show All command to the “Top Hit”. Thus you can hit Command-Return to select the Top Hit for a Spotlight menu search. (Thanks to Josh Bryant.)
You can use Command-↑ and Command-↓ to jump between the top hits in each of the categories in the results list. And you can use Control-↑ and Control-↓ to jump to the first and last items in the menu (“Show All” and “Spotlight preferences”, respectively).
You can Command-click on any item in the results list to reveal that item in the Finder instead of opening it.
Safari’s Address Bar Is Customizable ★
You can customize Safari 2.0’s address bar much like you can with most Mac OS X applications:
- You can use Command-drag to rearrange the order of the elements in the address bar
- There’s a “Customize Address Bar” command in the View menu, which opens a dialog box where you can add and remove additional buttons.
A side effect of this change is that the bogus “Show” menu item in Safari’s View menu — which was permanently disabled because it wasn’t a menu command at all, but rather a label, and which I complained about two years ago here — is gone. The View menu in Safari 2.0 is both simplified and more useful now.
(Thanks to many people for pointing this out.)
The Sizzling Trash Can Sound ★
The Tiger Finder adds a bunch of new goofy user-interface sounds. Most annoying is the one that plays when you empty the trash. I’m not even sure what it’s supposed to be — crumpling paper? To me it sounds like something sizzling in a frying pan. This is the sort of fruitiness I expect from Microsoft, not Apple.
Dictionary Look-Ups From Other Apps ★
Tiger includes a new dictionary application, called, appropriately enough, Dictionary. Its data sources are the New Oxford American Dictionary and the Oxford American Writers Thesaurus. (Update: Several non-U.S. readers have confirmed that these are the only data files available. Regardless what you choose for your main language — German, Spanish, Dutch, Japanese, whatever — you’re stuck with U.S. English data for Dictionary.)
There are a few convenient ways to invoke dictionary look-ups from other applications:
For any services-aware app, there’s a “Look Up in Dictionary” command in the Services menu. This uses the selected text in the current application as the look-up query, and the results are displayed in Dictionary app’s main window. (Dictionary’s typesetting is pretty nice, too; it’s actually a Web Kit view, with the layout and typesetting specified via XSLT transformations. Baskerville is a nice choice for the main typeface.)
For most Cocoa apps, there’s a “Look Up in Dictionary” command in the contextual menu when you Control-click on a word in an NSTextView field. This also works in Web Kit views. Note that this not a simple Cocoa-vs.-Carbon issue; it’s the control views NSTextView and WebView which have this capability. Yes, it doesn’t work in BBEdit, but not because BBEdit isn’t “Cocoa”. But Cocoa apps that use their own custom text views which aren’t derived from NSTextView, like, say, TextMate, don’t get “free” support for this contextual menu command, either. I’m hoping this is something developers will be able to add support for.
By default, look-ups from the contextual menu are displayed in the Dictionary app, just like look-ups from the Services menu. But there’s a preference in Dictionary to use the “Dictionary panel” for contextual menu look-ups. The panel is really neat — it displays the definition in a small, index-card-like floating panel directly under the looked-up word, right in the current application. Very clever, very convenient. Unfortunately, whatever magic is being used to display this panel prevents it from being captured in a screenshot. (If you’ve figured out a way to get a screenshot of it, let me know.)
Update: A bunch of readers wrote to point out that you can use the Grab utility’s timed-screenshot feature to snap a screenshot of the Dictionary Panel. I’ve been using Snapz Pro for so long, I forgot about Grab. Here’s an example:
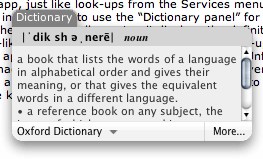
There’s a system-wide keyboard shortcut, Control-Command-D, which, rather than being tied to the item in the Services menu, is specified in a special new “Dictionary” section in the Keyboard Shortcuts section of the Keyboard & Mouse panel in System Preferences. Like the contextual menu command, this only seems to work in Cocoa apps that use NSTextView and WebView. Look-ups via this keyboard shortcut are always displayed using the Dictionary panel.
Using the keyboard shortcut is somewhat curious. Rather than using the selected text as input for the query, it uses whatever word is underneath the mouse cursor. So if you select some word (in, say, TextEdit or Safari), but move the mouse cursor over some other word, when you hit Control-Command-D, it’s the word under the mouse cursor that gets looked up. Conversely, if the mouse point isn’t currently hovering over a word, you can’t use the keyboard shortcut. I don’t see the appeal of this at all: if you’re already using the mouse, it’s much more convenient to use the contextual menu; and if your hands are on the keyboard, you’ve got to take one off to position the mouse over the word you want to look up before you invoke the keyboard shortcut. It would make a lot more sense for the keyboard shortcut to use the text selection, or whatever word the insertion point is touching.
Update: If after invoking the Command-Control-D shortcut, if keep the Command and Control keys pressed down, you can move the mouse around and the Dictionary panel will move around with the pointer, showing the definition for each word you hover over.
(There’s also a Dictionary Dashboard widget, but the only way to use it is to switch to Dashboard and type your query in the Dictionary widget by hand. I’m more interested in ways to invoke look-ups on-the-fly while I’m reading or writing.)
Fitts’s Law and the Apple and Spotlight Menus ★
After 20 years, Apple is finally taking maximum advantage of Fitts’s Law with regard to the Apple menu. How? By allowing the target area for the Apple menu to extend all the way to the top-left corner of the main display.
The gist of Fitts’s Law is that the time it takes to point to a target — in our case here, with your mouse or trackpad — is a function of the distance and size of the target. Bigger and closer targets are easier to hit. Sounds obvious.
What’s not obvious is that the pixels at the edge of your display are, effectively, infinitely large targets. You can move your mouse “up” as far as you can, and the on-screen pointer will remain in the top row of pixels on screen. This is why the Mac OS menu bar is so much easier to hit than the menu bars in Windows (and all the open source desktops that rip off the Windows UI).
There are four pixels on your display that are infinitely large in two dimensions — the corners. Out of all the millions of pixels on your display, these four pixels are by far the easiest to hit. Drunk and blindfolded, you could still effortlessly put the mouse pointer precisely on any of these four pixels — move the mouse “way up, way left”, and you know it’ll be positioned in the very top-left corner of the screen.

Starting with Tiger, you can now click in the top-left corner to trigger the Apple menu. And on the other side of the menu bar, you can click the top-right corner to trigger the Spotlight menu. Extending these menus to the corners only consumes a few extra visible pixels, but dramatically increases the ease with which you can target them.
iChat Text Input Field Stays Active When Person Goes Offline ★
In previous versions of iChat, when someone you were chatting with went offline, the text input field in your chat window would disappear. This made sense, because you can’t send messages to someone who isn’t logged in to AIM.
In iChat 3 (the new version in Tiger), however, the text input field remains enabled and active even when the person you’re talking to has gone away. Only after you type a message into the field and hit return do you get a sheet telling you that the message couldn’t be sent because the person is no longer online. Hopefully this is a bug, not by design, because it’s infuriating.
Update: Dozens of readers — several dozen, in fact — have written to say that this change is most definitely a feature, not a bug. The deal is that some AIM clients support “invisibility”, which means you’re logged in, but it appears to others as though you’re offline. So with previous versions of iChat, you were unable to chat with anyone who was invisible, because the text input field in the chat window would go away because it looked like they were offline.
I really wish this were a preference setting. At the very least, there should be some sort of indication of the status of the person you’re chatting with in each chat window, without having to open the Chat Participants drawer. The disappearing text input field served that purpose previously.
Discontinuous Text Selections in NSTextView ★
NSTextView — the default text editing control in Cocoa apps — has
been significantly upgraded. You can do discontinuous selections with
Command-drag, and column selections with Option-drag. You can use
these new selection gestures in most Cocoa apps — including in
textarea fields in Safari and any other app that uses Web Kit.
(Thanks to Quentin Carnicelli.)
Contextual Menu for Finder Sidebar ★
One of the very few actual improvements in the Tiger Finder: you can finally get a contextual menu for items in the sidebar. (Thanks to Ferdinand Svehla.)
StuffIt Expander No Longer Included ★
StuffIt Expander is no longer included on a fresh installation of Mac OS X. If you installed as an upgrade, your old copy is left untouched, but if you do a clean installation, it isn’t installed.
On the plus side, the faceless BOMArchiveHelper application, which in 10.3 only expanded ‘.zip’ files, now expands ‘.gz’, ‘.tar’, ‘.bz2’, and possibly other open archive formats — and it does so much faster than StuffIt Expander. But, StuffIt’s own file formats (‘.sit’ and ‘.sitx’) aren’t open, and so if you want to be able to open them, you’ll need to install StuffIt Expander on your own.
(Thanks to Dan Benjamin.)
Plist Preference Files Default to Binary ★
Mac OS X has always supported several formats for property list files (a.k.a. ‘plists’). The system’s built-in preferences system uses plist files for storage, and the default format for preference files in 10.3 and earlier was XML. The default in 10.4, however, is binary. You can see it yourself using a text editor to examine plist files in your preferences folder.
If you want to look at a human-readable version of a plist prefs file in plain text, use the defaults command; e.g. defaults read com.apple.finder. For even more details, check out the man page for the plutil tool. And the easiest way to examine the contents of any plist file — whether binary or XML — is the Property List Editor.
‘.app’ File Extensions ★
If you turn on the Finder’s “Show all file extensions” preference, this now includes the “.app” extension on application bundles. In 10.3 and earlier, “.app” bundles were a special exception — they were never shown, even with this setting turned on. In Tiger, even though this is ostensibly a Finder preference, you see them everywhere you when you have this pref on.
E.g. in Script Editor’s Open Dictionary dialog:
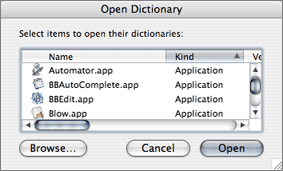
I can’t stand seeing these insipid “.app” extensions everywhere, but I don’t want to turn off the “Show all file extensions” preference because I do want to see the rest of them. What I want is the old behavior, “Show all file extensions, except for the insipid ‘.app’ ones that completely booger up the names of every single application”.